Appam
This is a delectably soft dish from Kerala, that is made
from Rice and Coconut. The traditional look of Appam is that it is thick in the
center, lacy and brown at the edges. I make it slightly differently, by keeping
it even all over. The reason for this is – it stays softer for longer. There’s
no crispy brown edge to go soggy after awhile, and cooking time per appam is
less. Plus, this is how hubby dear prefers it J.
My kids also love it, and that clinched the deal for me.
Also, I use this same batter to make snacks like “Sweet Appam” and “Easy
Vattayappam”. One batter – many uses.
Initially, when I used the Appam Chatty, I ended up with
different shapes. It took me awhile to get the hang of it and now they’re all
round and good-looking. If you don’t have an Appam Chatty, you can also make it
over a Dosa Pan, with a separate lid. I have done that also, when I had only an
induction cooker on which Appam Chatty wouldn’t work.
The trick to Appam making is to get the ingredient quantities
right. I took tips from both Mom and MIL to get my batter right. I prepare the
batter before sleep, and leave it overnight to ferment and rise. Though the
preparations (and waiting time for batter to rise) might seem daunting, it’s
only the first time you’ll feel so. After that, Appam will become a frequent
breakfast item at your home, like in mine.
Ingredients
- Raw Rice – 2 cups, soaked in water for 3-4 hours (I use Sona Masoori Raw Rice)
- Grated coconut – 1 cup
- Cooked rice – 1 cup (I use the Kerala Matta Rice at home, and this is what I add here)
- Yeast – 1-2 tsp
- Sugar – 2 tbsp
- Salt – A small pinch
Method
- Wash and keep the raw rice soaked in water for 3-4 hours. (Note: Sometimes, when I’ve forgotten to soak the rice on time, I’ve kept it soaked for as less as ½ an hour and batter still came out ok.)
- Before grinding, move the water in soaked rice to another small bowl. Don’t throw it away, we’ll use this for grinding. The main trick to get soft appams is to make sure that you don’t add too much water when grinding. Just enough rule works best.
- Add the grated coconut, yeast, sugar, and salt to the soaked rice. Mix well.
- Grind the batter with just enough water (use the water kept from the soaked rice).
- Pour batter into a vessel such that, batter reaches only ¼ of the vessel. See Note below.
- Keep it closed with a lid and leave it overnight.
- In the morning, ta da, your batter has risen well and is ready to use.
- Mix the batter very well, and heat your appam chatty (make sure it is only medium hot).
- Pour a ladle spoon of batter into the appam chatty, and swirl it around so that batter is evenly spread. (If you want the traditional style appam, remember to increase the quantity of batter you pour and when swirling, let the extra batter settle at the center).
- Keep it closed for less than a minute. (Again, for traditional style appam, keep it for longer, for the center to be cooked completely, and the sides to be browned.)
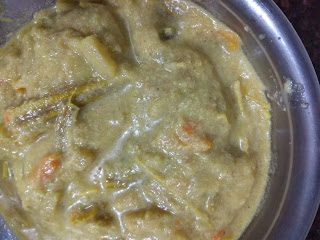
- Your soft and tasty appam is ready to be served with a side dish of your choice. It goes best with Chicken or Vegetable Stew. I also enjoy it with spicy curries like Chicken Curry, Egg Curry or Potato Masala.
Note: Like bread baking, the appam-batter-rising also depends on how hot or warm it is at your place. When it is cold outside, I keep the batter tightly closed (by keeping a heavy utensil on top of the lid). When the weather is hot, I just place the lid above the batter.
To be on the safe side, keep the vessel containing your batter inside a larger vessel. This makes sure that, in case your batter rises and falls outside the batter-vessel, the larger vessel will “catch” it and it doesn’t get wasted. This has happened to me many times during summer.


Comments
Post a Comment